


How to Make a Game Server at Home

Hosting your own dedicated game server provides you with a customizable gaming experience unlike any other.
Along with offering you advanced stability and reliability for memory-intensive online multiplayer games, hosting your own dedicated game server allows you to control every aspect of gameplay—including establishing game configurations and choosing which players can connect to your server.
No matter if you are playing Minecraft, Counter Strike: Global Offensive, or Rust, running your own dedicated game server gives you access to more memory, processing power, bandwidth, and storage capabilities than any other hosting model, as well as admin-level oversight across your entire gaming platform.
Interested in learning how to make a game server for your own game or for a game you can play with your friends? This guide is here to break it down for you.
Below, we will walk through:
- Why you should host your own dedicated gaming server.
- The pros and cons of making your own server.
- The hardware required for an at-home server build.
- How to set up a game server for both Steam and non-Steam games.
- General dedicated game server tips.
Why Host Your Own Dedicated Server?
Public online multiplayer games use client-server hosting or peer-to-peer (P2P) hosting. Unfortunately, both hosting models have drawbacks, including non-customizable game configurations or dealing with gameplay lag.
- Client Server Hosting Model: In the client server model, the main host (such as larger game publishers) controls the game servers. This means that the main host directly manages individual connections for all players, and that individual players do not have control over all aspects of game configuration. This model works for many recreational online gamers, but it doesn’t allow avid gamers to control their gaming experience at a granular level. It also leaves players at the mercy of the main host’s servers should an issue occur.
- P2P Hosting Model: In the P2P model, the player who initiated the game or has the lowest latency is selected as the host for all other players. This means that the host-player’s computer must have processing power, bandwidth, storage capacity, and a strong Internet connection to maintain syncing and activities for all players within the game. If the player-assigned host has an inadequate device or spotty Internet connection, all players in the game will deal with lags, glitches, or worse, the entire game crashes.
However, by creating your own dedicated server for gaming, you gain access to a private server (a server that does not share the same resources with other websites or applications) that provides you ultimate control over game configuration with more performance and connection stability.
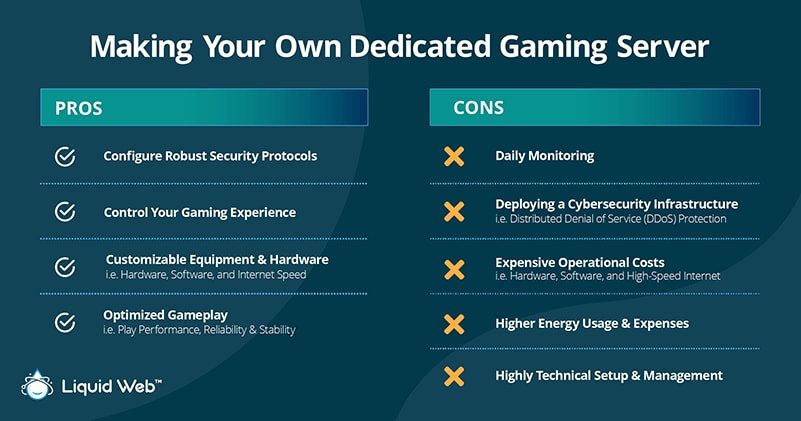
Pros of Making Your Own Dedicated Server
Making your own dedicated game server comes with many benefits, including:
- Gaining total control over your gaming experience.
- Selecting your own equipment and hardware specifications.
- Providing better gameplay performance, reliability, and stability.
- Establishing your own robust security protocols.
Cons of Making Your Own Dedicated Server
While making your own dedicated game server comes with many benefits, you should consider a few cons before creating one. These servers require:
- Buying and maintaining expensive equipment, hardware, software, and a high-speed Internet connection.
- Working through a highly-technical server setup and management process.
- Daily server monitoring.
- Handling your own cybersecurity infrastructure, such as Distributed Denial of Service (DDoS) protection.
- Paying higher energy bills.
- Constant maintenance of network configurations such as opening the correct ports, setting firewall rules, and more.

What Do You Need to Make a Gaming Server?
If you want to go the DIY route rather than pay for premium dedicated server hosting, you can technically use an old PC that you already have (although you will definitely have to upgrade most components), or you can buy the components from scratch to make a gaming server. In general, a gaming server requires all the components that a gaming PC does, aside from a graphics card. These include:
- Computer case.
- Motherboard.
- Central processing unit (CPU).
- Random access memory (RAM).
- Hard drive.
- Operating system (OS).
For most of the latest 32-player online multiplayer games, you’ll need, at minimum, the following specifications:
- Gaming case with built-in cooling fans.
- Server motherboard.
- CPU with a minimum 2.5GHZ clock speed.
- 8GB of RAM (16GB or more is optimal).
- 1TB Solid State Drive (SSD) with high read and write speeds.
- 64-bit Windows or Linux OS (depending on game compatibility).
If you’re able to use a separate PC for your dedicated game server, you’ll be able to free up resources on your actual gaming PC. This ensures more stability and reliability for both.
How to Set Up a Game Server with Steam
Steam features a seamless and centralized process for setting up a dedicated game server. Before you begin, ensure that the game you want to host is featured on Steam’s list of dedicated servers. This list will tell you whether you can obtain the required software from SteamCMD (a command-line-only version of Steam) or the Steam Client. In addition, this resource also provides information like:
- If a game allows for anonymous login or if you must purchase it to access the dedicated server software.
- Step-by-step instructions for dedicated server setup for some of the popular games.
Using SteamCMD
SteamCMD is a command line program that allows you to install and set up your dedicated game server without installing the Steam Client. Before using SteamCMD, you must know the Steam App ID number of the game. If a game has dedicated server software without its own app ID, be sure to review the game’s installation directory.
The simplest way to use SteamCMD for a dedicated game server setup is with the SteamCMD-GUI tool. Using this convenient program, you can establish and run servers for many Steam-ready games in just a few clicks, as well as source servers for many older titles. The SteamCMD-GUI tool is quite easy to use, but you must download the SteamCMD program separately beforehand.
Popular Steam Games for Dedicated Servers
A few of the most popular Steam games for a dedicated game server include:
How to Set Up a Game Server for Non-Steam Games
Many games don’t use Steam as the basis for a dedicated game server, which means they feature their own server software or unique server setup process. For example, Minecraft uses proprietary hosting software to create a dedicated game server using your own hardware.
How to Create Your Own Minecraft Server
Learning how to create your own Minecraft server might be easier than you expected. To get started, you must first download the server software from the official Minecraft website. You will get the option to download software for both Java or Windows 10, so be sure to select the correct version based on your needs.
After your server software program is downloaded and running, it will create additional files and folders in whatever location you run it from. For housekeeping purposes, create a separate Minecraft Server folder to ensure the files stay organized.
When you first run the server, it will create the following:
- /logs/
- Eula.txt
- server.properties
From there, open eula.txt, read the file, change the last string from eula=false to eula=true in a text editor, and save it. This signifies that you have reviewed and understood the end-user license agreement. When you run the server again, the remainder of the server files will be populated. You can then configure server settings by editing server.properties in a text editor.
The general process of establishing a Minecraft server is to install Java, run the server, accept the end-user license agreement, and rerun it. For in-depth information on setting up a Minecraft server, review the Minecraft Wiki tutorial.

Dedicated Game Server Tips
If you plan on building and managing your own dedicated server at home, there are a few tips you should keep in mind, including:
Remote Management
Remote management is a solid option when built-in server admin tools for games don’t provide enough control. Virtual network computing (VNC) tools like TeamViewer or Microsoft Remote Desktop Connection can connect to your dedicated game server from your actual gaming PC’s desktop or another remote device and change configurations as if you were directly connected. This solution makes remote dedicated server management easy.
Router Configuration
- Port Forwarding: To run a streamlined dedicated game server, you must utilize port forwarding. This process successfully allows outside traffic to reach a PC on your network through your router. Simply put, you can think of port forwarding as opening a door in your router for outside traffic to get in. Port forwarding can do things like increase connection speed, decrease lobby wait times, and improve overall gameplay.
- Dynamic DNS: Many cable and digital subscriber line (DSL) providers frequently change the IP address of their customers' service. This makes it impossible for those outside of the network to access it without knowing the current IP address. Dynamic DNS (DDNS) software—which could reside in your router or on your PC—detects each IP address change and notifies the DDNS service provider. In addition, many DDNS providers allow you to have a simple domain name that you can share with others (rather than a complex IP address) that always points to the correct IP address.
Managed Dedicated Server Hosting: An Easier Alternative
Learning how to make a game server can be an overwhelming process.
From buying and maintaining expensive equipment, hardware, and software to needing technical expertise to set up and manage your server daily, there are many things to consider before making your own dedicated game server at home.
Fortunately, there is a way to reap all the benefits of a dedicated game server without the headache of running one on your own: managed dedicated server hosting.
Managed dedicated server hosting through a professional provider makes setting up your own private game server easy, affordable, secure, and fast.
At Liquid Web, we provide fully customizable dedicated server hosting, so you don’t have to stress over hardware costs, the server setup process, or security risks like DDoS attacks. We even give you full root or admin access to your server, allowing you to maintain a level of control you might require.
Plus, you can utilize our managed dedicated servers with both Steam and non-Steam games. Provided that the server's operating system is compatible with the specific game, the sky’s the limit with full root and admin access (something you can also expect with our dedicated servers).
In addition, we provide real-time server monitoring, 100% power & network uptime guarantees, and access to higher bandwidth options—all to ensure you a smooth gaming experience.
Discover how easy it is to set up your own dedicated server for gaming with Liquid Web today.


Jeremy Sorensen
Jeremy Sorensen started his career with Liquid Web eight years ago and has never looked back. As a product manager for Managed Hosting, Jeremy has accumulated a wealth of knowledge via his past roles in sales and training in web hosting. He also has a deep passion for technology, especially in hosting, and offering the best solutions to meet business needs is what excites him most. In his free time, you can catch him gaming, exercising, traveling, or taking some drone photography. And his most favorite pastime is spending time with his dog, Rex.


Keep up to date with the latest Hosting news.